Before we dig into why you need simple marketing automation, let’s define why experts such as coaches and consultants need automation in the first place.
Then, we’ll describe the complete process from defining your offer to securing a qualified discussion with your prospect.
Have you ever sat wondering why you aren’t keeping in touch with your clients and prospects.
You have a bunch of email addresses, and you know you should do something, but you just don’t.
Or you have created this wonderful checklist or an interactive quiz/assessment. People have been using it and leaving their email addresses. But all they hear at your end is silence.
Or, you are just getting started with demand generation and you need a good & scalable way to finally get the word out there about your offer.
There are many reasons for not setting something up.
Meanwhile you are leaving valuable opportunities to keep your brand front and center. Take this quiz to see what growth opportunities you are leaving on the table.
What if some of those people need exactly what you offer right now, but they are not thinking of you because they don’t see you?
Worse still, you are running ad campaigns and doing social media posts, and your investments are not returning you optimal results. That’s money and effort wasted.
The key to sales and marketing is to know your audience (have their contact info), and to keep in touch with relevant outreach and offers. Social media platforms often limit your reach so even though you may be posting every week, not everyone is seeing it.
That’s where simple marketing automation comes in.
But, the keyword is “simple”. Don’t overcomplicate it.
A marketing automation system is like a shiny toy. It has many wonderful bells and whistles. And there are so many attractive sounding ways to set it up.
As a result, it’s very easy to get wrapped up in all the sophistication and possibilities they offer. From multiple workflows that connect with each other, moving people between dynamic segments, progressive profiling, to setting up automations that automatically work to satisfy every tiny personalization opportunity, and so on.
The end result is confusion and procrastination. And a system or process that is half done. It doesn’t serve your clients well, and it certainly doesn’t serve you.
Remember, keeping it simple does not mean it’s bad.
Our aim is to follow the 80-20 rule – most of your returns will come from a handful of smart actions. Everything else is icing on the cake that you don’t need to worry about when you’re starting out.
Here’s a tried and tested proven formula for success that has literally worked for hundreds of years.
It’s not rocket science and simply based on the fundamentals of sales and marketing.
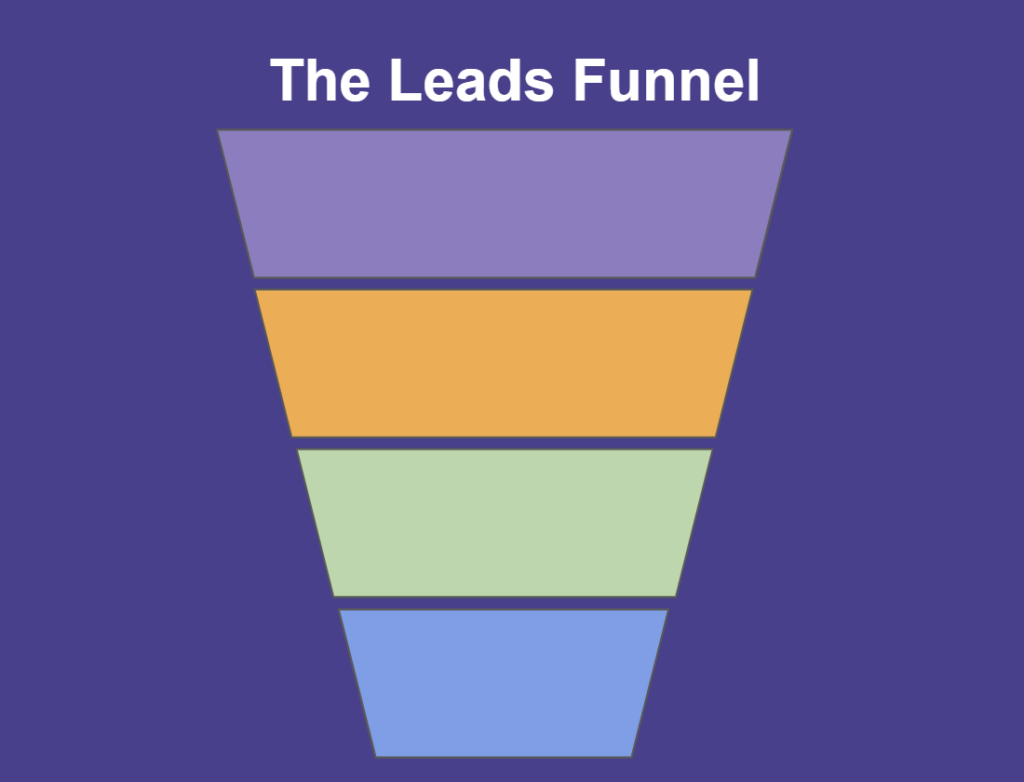
The same formula applies to a digital lead generation funnel. However, it’s amazing how many people struggle to set this up (including us!).
Sometimes, you may not need steps 7 and 8. However, unless you’re selling a very low ticket item, clients will need to be sold to actively. So it’s best to include these steps when you are designing your process.
Action:
Before you do anything, answer these questions clearly:
Now, let’s get to the steps to Simple Marketing Automation
On your website, go ahead and set up a new landing page that describes your lead magnet.
Include clearly:
For the lead magnet itself, you can create a simple quiz using Evalinator (or any other quiz platform) and include that on your page. Remember to have simple questions and ensure that people get the results you promise. The quiz should help the respondent diagnose something that you can later help them with.
Evalinator (or other quiz platforms) has a built in email capture form already so you don’t have to mess around with that part.
For example, here’s a “B2B Growth Quiz”. It’s a pretty comprehensive list and respondents get a lot of value just going through the quiz. At the end it gives them their score, and some recommendations on what they should be doing to improve. You can take the quiz and see how it works.
On this page, you will need a form to include. This form will capture the email addresses and kick off the automation workflow. The next step is for that.
If not using a quiz: Email capture & Auto-Responder
You need to capture email addresses on your landing page and have those email address submissions go into a marketing automation system such as MailerLite.
This is very easy to do and very low cost. As you’re starting out, many marketing automation systems also offer free tiers. So you start paying only once your email list starts growing and you start seeing the value.
What you need to do is to create a “form” in your marketing automation system. This form will have a text area where you can describe your checklist (or another lead magnet), a field for name, and a field for email address. Once you save your form, your system will provide you with a script to place on your landing page. For the most part these are very simple steps so you can do them yourself within a few minutes.
Remember to keep this simple. You can evolve it as the process starts working. Have the email addresses go to a single group, list, or segment – whatever your system calls it. No need for anything else.
Avoid any fancy suggestions – however lucrative or logical they may sound. If you were ready for those you wouldn’t be reading this blog.
What this step does is provides you with a single place to have all your email addresses.
Along with the form, go ahead and configure an auto-responder email. This is a basic feature of any marketing automation system so it should one of the simplest things you can do. You do this so that as soon as someone submits their email address, you can email them a link to your checklist, quiz results, or any other asset that you promised your prospects in return for their email address.
Don’t get too hung up on how the email looks. Simple is better.
Note:
If you have an assessment (quiz, wheel of life, maturity model etc.) on Evalinator, you don’t even have to set up a form. Evalinator will send the email address directly. All you have to do is to set up that auto-responder to trigger as soon as a new email address is received.
Now that you have people responding to your ads, and receiving your email, you need to drive them to something that is more valuable to you.
This high commitment action can be to attend a demo or a webinar, or sign up for a free trial.
So make sure you have a landing page or process set up for this. In your emails and in your retargeting ads you will drive people to this offer.
This step is often where a lot of folks give up. Coming up with 7-10 emails is not an easy task.
Look up our blog titled storytelling framework for experts. That provides you a series of 6 ready made emails to put in your email sequence. They start with telling your story and your inspirations, and then each subsequent email also uses stories as you mention your methodology, client case studies, and so on.
These emails will go out every 5-7 days. They will provide value, and they will keep you top of mind of your prospect.
You can also insert a few additional emails with a little bit of helpful material on each of the topics in your checklist, or your interactive quiz/assessment. Your clients will find that very useful even if its only a couple of paragraphs long. You may not think so, but your insights are unique. Just be yourself and you’ll be fine.
As your email sequence runs out, you will be making active and obvious offers in the final few emails. The intent would be to drive them to your next level offer – demo, webinar, etc.
Research shows that about 4-7 touchpoints are needed to engage prospects. So if you have set up your first email sequence and added appropriate calls to action in every email, then you should be all set with the 80-20 rule.
Once you’ve set up the above automation, all you have to do is to get out and raise visibility:
Read this post on content marketing tactics to get the word out.
And this feature on Evalinator also gives you automatic social media posts every 3-4 days!
80% of the impact you wanted will be delivered using this method. If you have time or budget to hire more expertise, then do so to magnify the benefits of marketing.
Of course, nothing is a certainty. But whether you end up increasing sales or not, you will come away with valuable lessons.
For example, if you don’t get any conversions, then perhaps your lead magnet is not attractive or you are targeting the wrong people, or perhaps your messaging is not clear, or it could be anything else.
Learning this can help accelerate your path to success.
These steps are optional. So set them up when you don’t see ANY email addresses coming through from your lead magnet.
For most experts starting out, if you keep up social posting and write blogs, the average lead generation with your lead magnet is between 2-15 email address a month, with 0-3 of those converting into your next step, and ultimately between 0-2 sales.
Tracking how many people visit your landing page
If you have a website, then set up google analytics tracking. This is a simple free service that helps you analyze the traffic on your website. Go to analytics.google.com and create an account. Set up your website as a property and get the script that Google will provide you. Place that script on your website (instructions vary but just search for it and you’ll get the right instructions).
Ads preparation:
Two scenarios apply:
Go ahead and create those ad accounts on LinkedIn, X, or Facebook, and set up the LinkedIn tracking and Facebook tracking codes as well. The process will be very similar to what you did for Google analytics.
Setting up Google, LinkedIn and Facebook ad accounts will be very useful while running what are called as “retargeting” ads – showing ads to people who have visited your website. They are cheaper and help you stay top of mind. We’ll cover that later.
Keep the budget low to start with (say $5 or $10 per day). Then as you see one or two people coming on to your landing page, and giving you their email address, you can slowly scale up your spending. You can also decide to wait to see how your sales follow-ups and outreach proceeds. If the people responding to your advertisement are not the right criteria, or they do not convert, you may want to adjust your targeting before you increase your budget.
Everyone who comes to your website is automatically tracked by Google, Facebook or LinkedIn. So you should also go ahead and set up a different ad to target those people. These are called “retargeting ads” and are typically cheaper – very useful to keep your service top of mind.
This is the 80-20 of marketing automation for most people. Once you have this, then feel free to do more advanced stuff. As time passes, you may want to have additional workflows for qualified prospects, onboarding clients, feature updates and so on. But start right now with simple marketing automation, don’t over complicate it.
Action:5 min growth opportunities quiz
If you would like to create an effective lead generation funnel, then sign up for the risk-free trial on Evalinator.
When you create an assessment on Evalinator, you can use it not only for lead generation, but also for discovery / strategy calls, and to grow your ongoing relationships.
Read up on the features and sign up for a 14 day free trial.
Sign Up for 14 Day Risk Free Trial
Feeling frustrated with lead generation?
Take this free, 5-minute quiz and get more prospects into your leads funnel.
Instant Results. Actionable recommendations. Email required.
Find Your Score >>