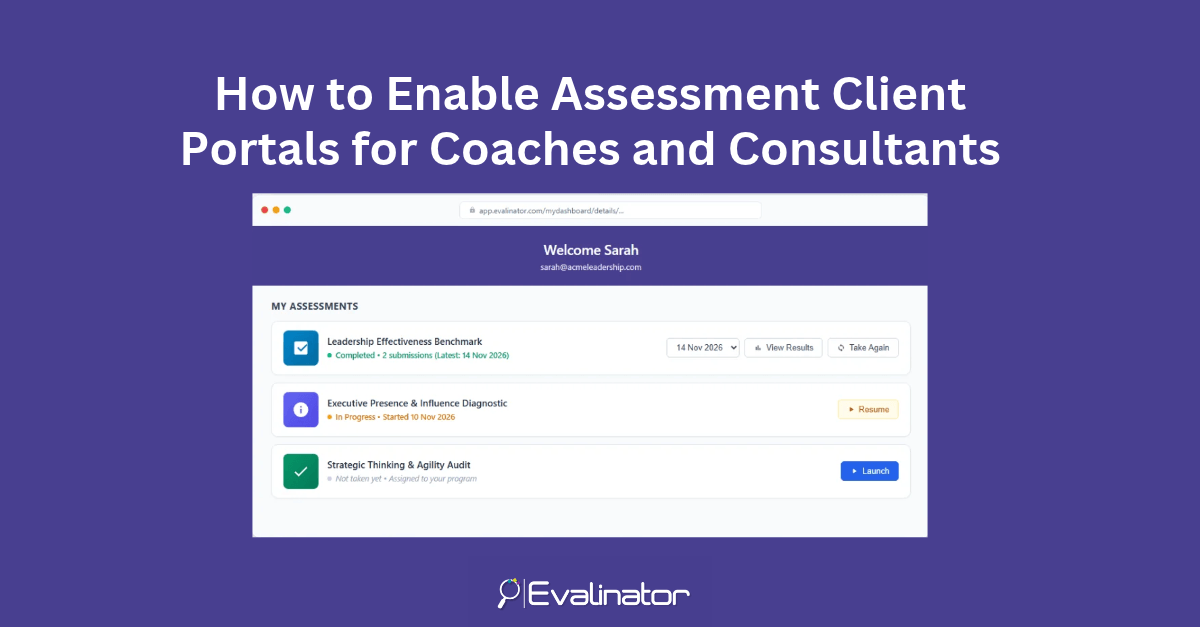
Assessment Client Portals are when clients work with you in coaching, consulting, or advisory programs, and need a single dedicated space where they can access their assessment results. They can also track their growth, and complete new exercises. This makes their experience seamless and professional.
Evalinator makes this easy with built-in Assessment Client Portals. Clients don’t have to create or remember passwords—they log in securely using their email address and a quick one-time verification code. Once inside, they see a personalized, branded hub with your company logo, photo, bio, and all their relevant assessments.
In this guide, we’ll explain where to find your links, how the portal works, and walk step-by-step through how assessments appear to your clients.
Evalinator provides two types of links on the Share tab of any published assessment:
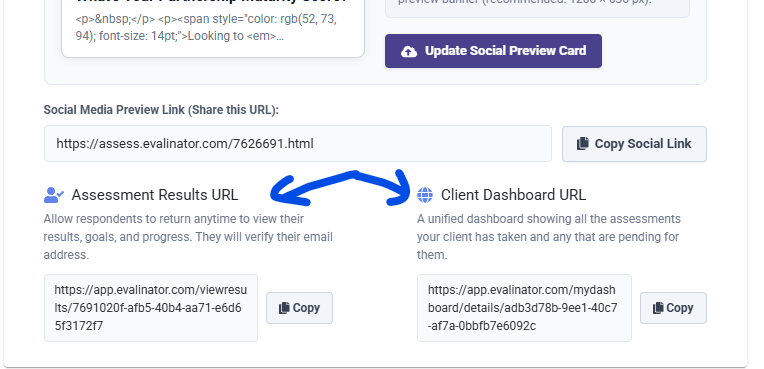
This link is specific to one assessment. When a client visits this link and enters their email, they go directly to their detailed results report for that particular assessment.
Where to find it: On your assessment’s Share tab, look for the Results Page Link card (format: https://app.evalinator.com/viewresults/[assessment-guid]).
Best used for: Sending a client a direct link to review or retake one specific diagnostic.
This is your all-in-one portal. It displays your branding, your bio, and all the assessments available to that client in one central dashboard.
Where to find it: On your assessment’s Share tab, scroll down to the Client Dashboard URL card (format: https://app.evalinator.com/mydashboard/details/[author-guid]).
Best used for: Welcome emails, onboarding packets, and as a permanent home for clients going through your coaching or consulting programs.
To keep things completely frictionless, Evalinator uses passwordless login:
No forgotten passwords, no password resets, and no administrative headaches for you.
Let’s walk through how Evalinator decides which assessments to show each client, starting from the simplest scenario and building up to multi-program clients.
Whenever someone completes (or starts) an assessment you’ve published, their response is recorded under their email address.
When they log into your Client Portal, they will automatically see every assessment they have already taken. For each assessment, they see:
Why does this happen automatically? Because a client’s historical results belong to them. As an author, you never have to remember to check a box or enable a setting for past assessments—Evalinator guarantees your clients always have continuous access to their records.
What if you want clients to see an assessment they haven’t taken yet?
By default, un-taken assessments stay hidden so your drafts, private tests, and other clients’ assessments aren’t exposed. To make a new assessment visible to a client before they take it:
The next time that client logs into their portal, the new assessment will appear on their dashboard with a clean Launch button ready to start.
If you coach teams at Company A and Company B, confidentiality is critical. You don’t want Company A’s employees seeing Company B’s internal assessments.
Simply create a group for Company A and a group for Company B, map the respective assessments to each group, and enroll the employees. Company A’s participants will only see Company A’s assessments, and Company B’s participants will only see Company B’s assessments. Everything stays strictly separated.
What happens if a client is enrolled in both your “Foundations Workshop” and your “Executive 1-on-1 Coaching”?
Simply add their email address to both groups. When they open their portal, Evalinator automatically combines the assessments from all their enrolled programs into one unified view. They don’t need separate links or separate logins.
What happens if someone took an initial assessment or intake scorecard on your website, but you haven’t assigned them to any program group yet?
When they log into the portal, they will only see the assessment they have already taken. They will never see any un-taken assessments until you deliberately enroll them in a program and map assessments to that program.
When it’s time for a quarterly check-in or progress review, clients don’t need a new link. They log into their assessment client portal, locate the assessment, and click Take Again.
Once submitted, their new score is saved alongside their earlier attempts. Both you and your client can use the date dropdown to switch between submission dates and review their growth together.
With Evalinator’s Assessment client portals, you give your clients a dedicated, professional home for their assessments and milestone progress—strengthening your coaching relationship at every step.
Sign up for a 2 week trial here.
Feeling frustrated with lead generation?
Take this free, 5-minute quiz and get more prospects into your leads funnel.
Instant Results. Actionable recommendations. Email required.
Find Your Score >>